Three steps for
creating a 3D image
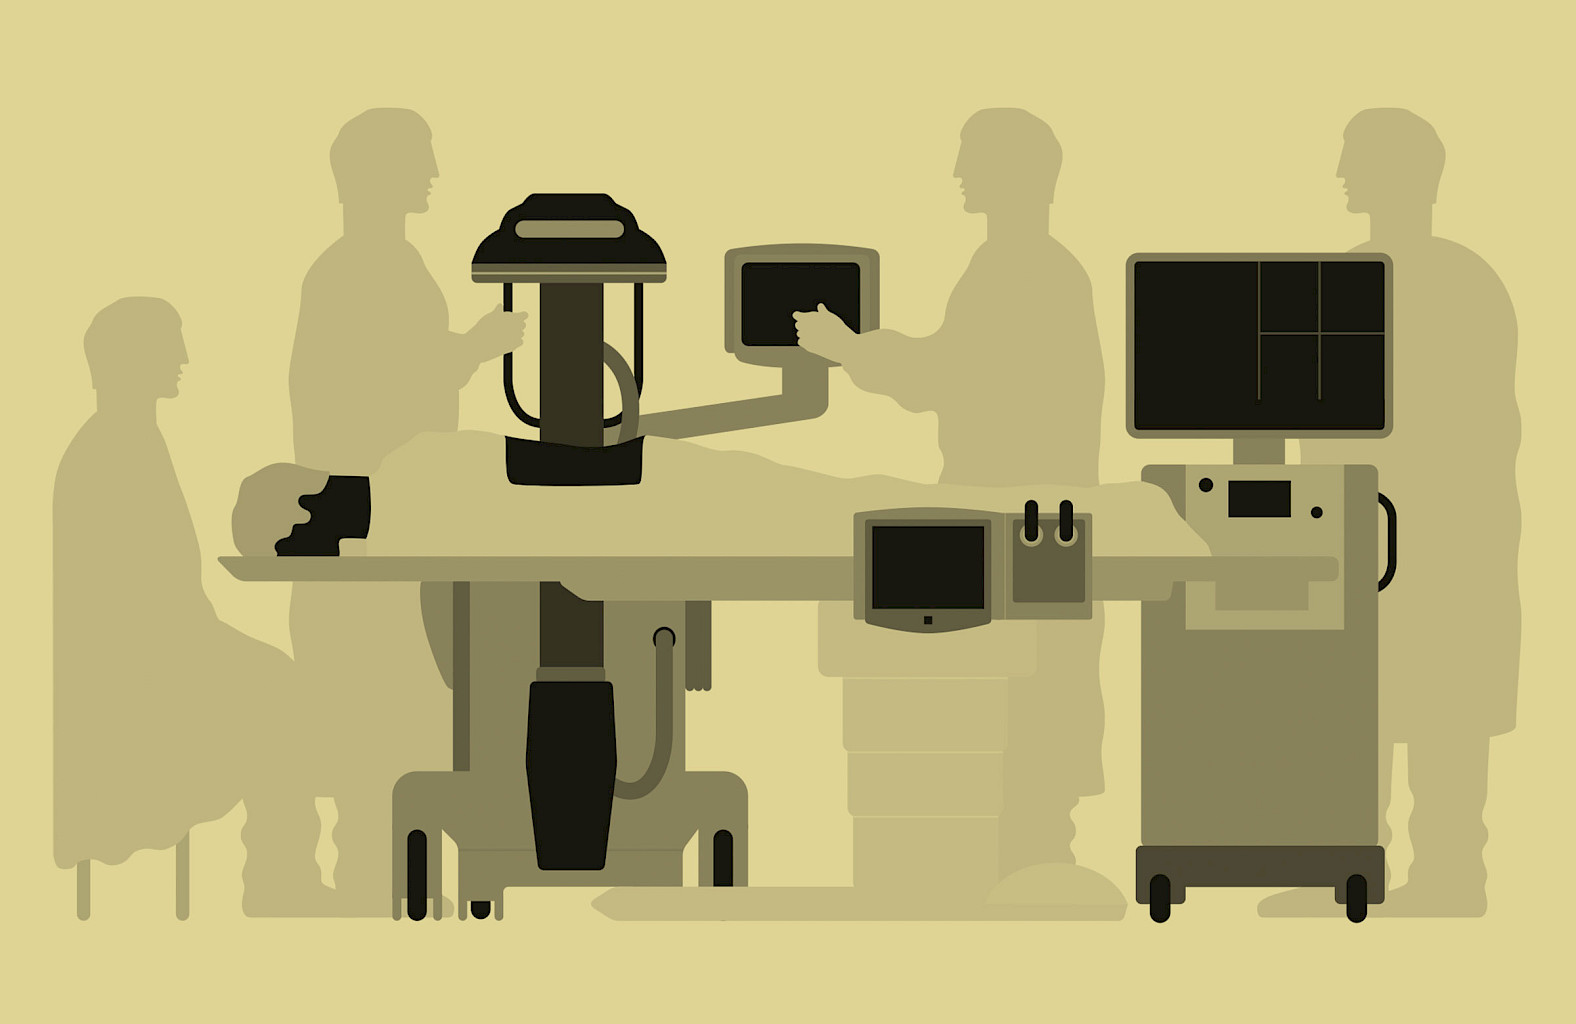
The Ziehm Vision RFD 3D is Ziehm Imaging's flagship. Its unbeatable image quality is extremely wellsuited for treating complex fractures. Using the revolutionary 3D imaging with mobile C-arms requires some adjustments to clinical routine for prepping and positioning the patient. Our experts at Ziehm Imaging are in communication with physicians and hospital personnel worldwide, providing all kinds of tips and tricks for clinical routine.
1
Prepare the OR
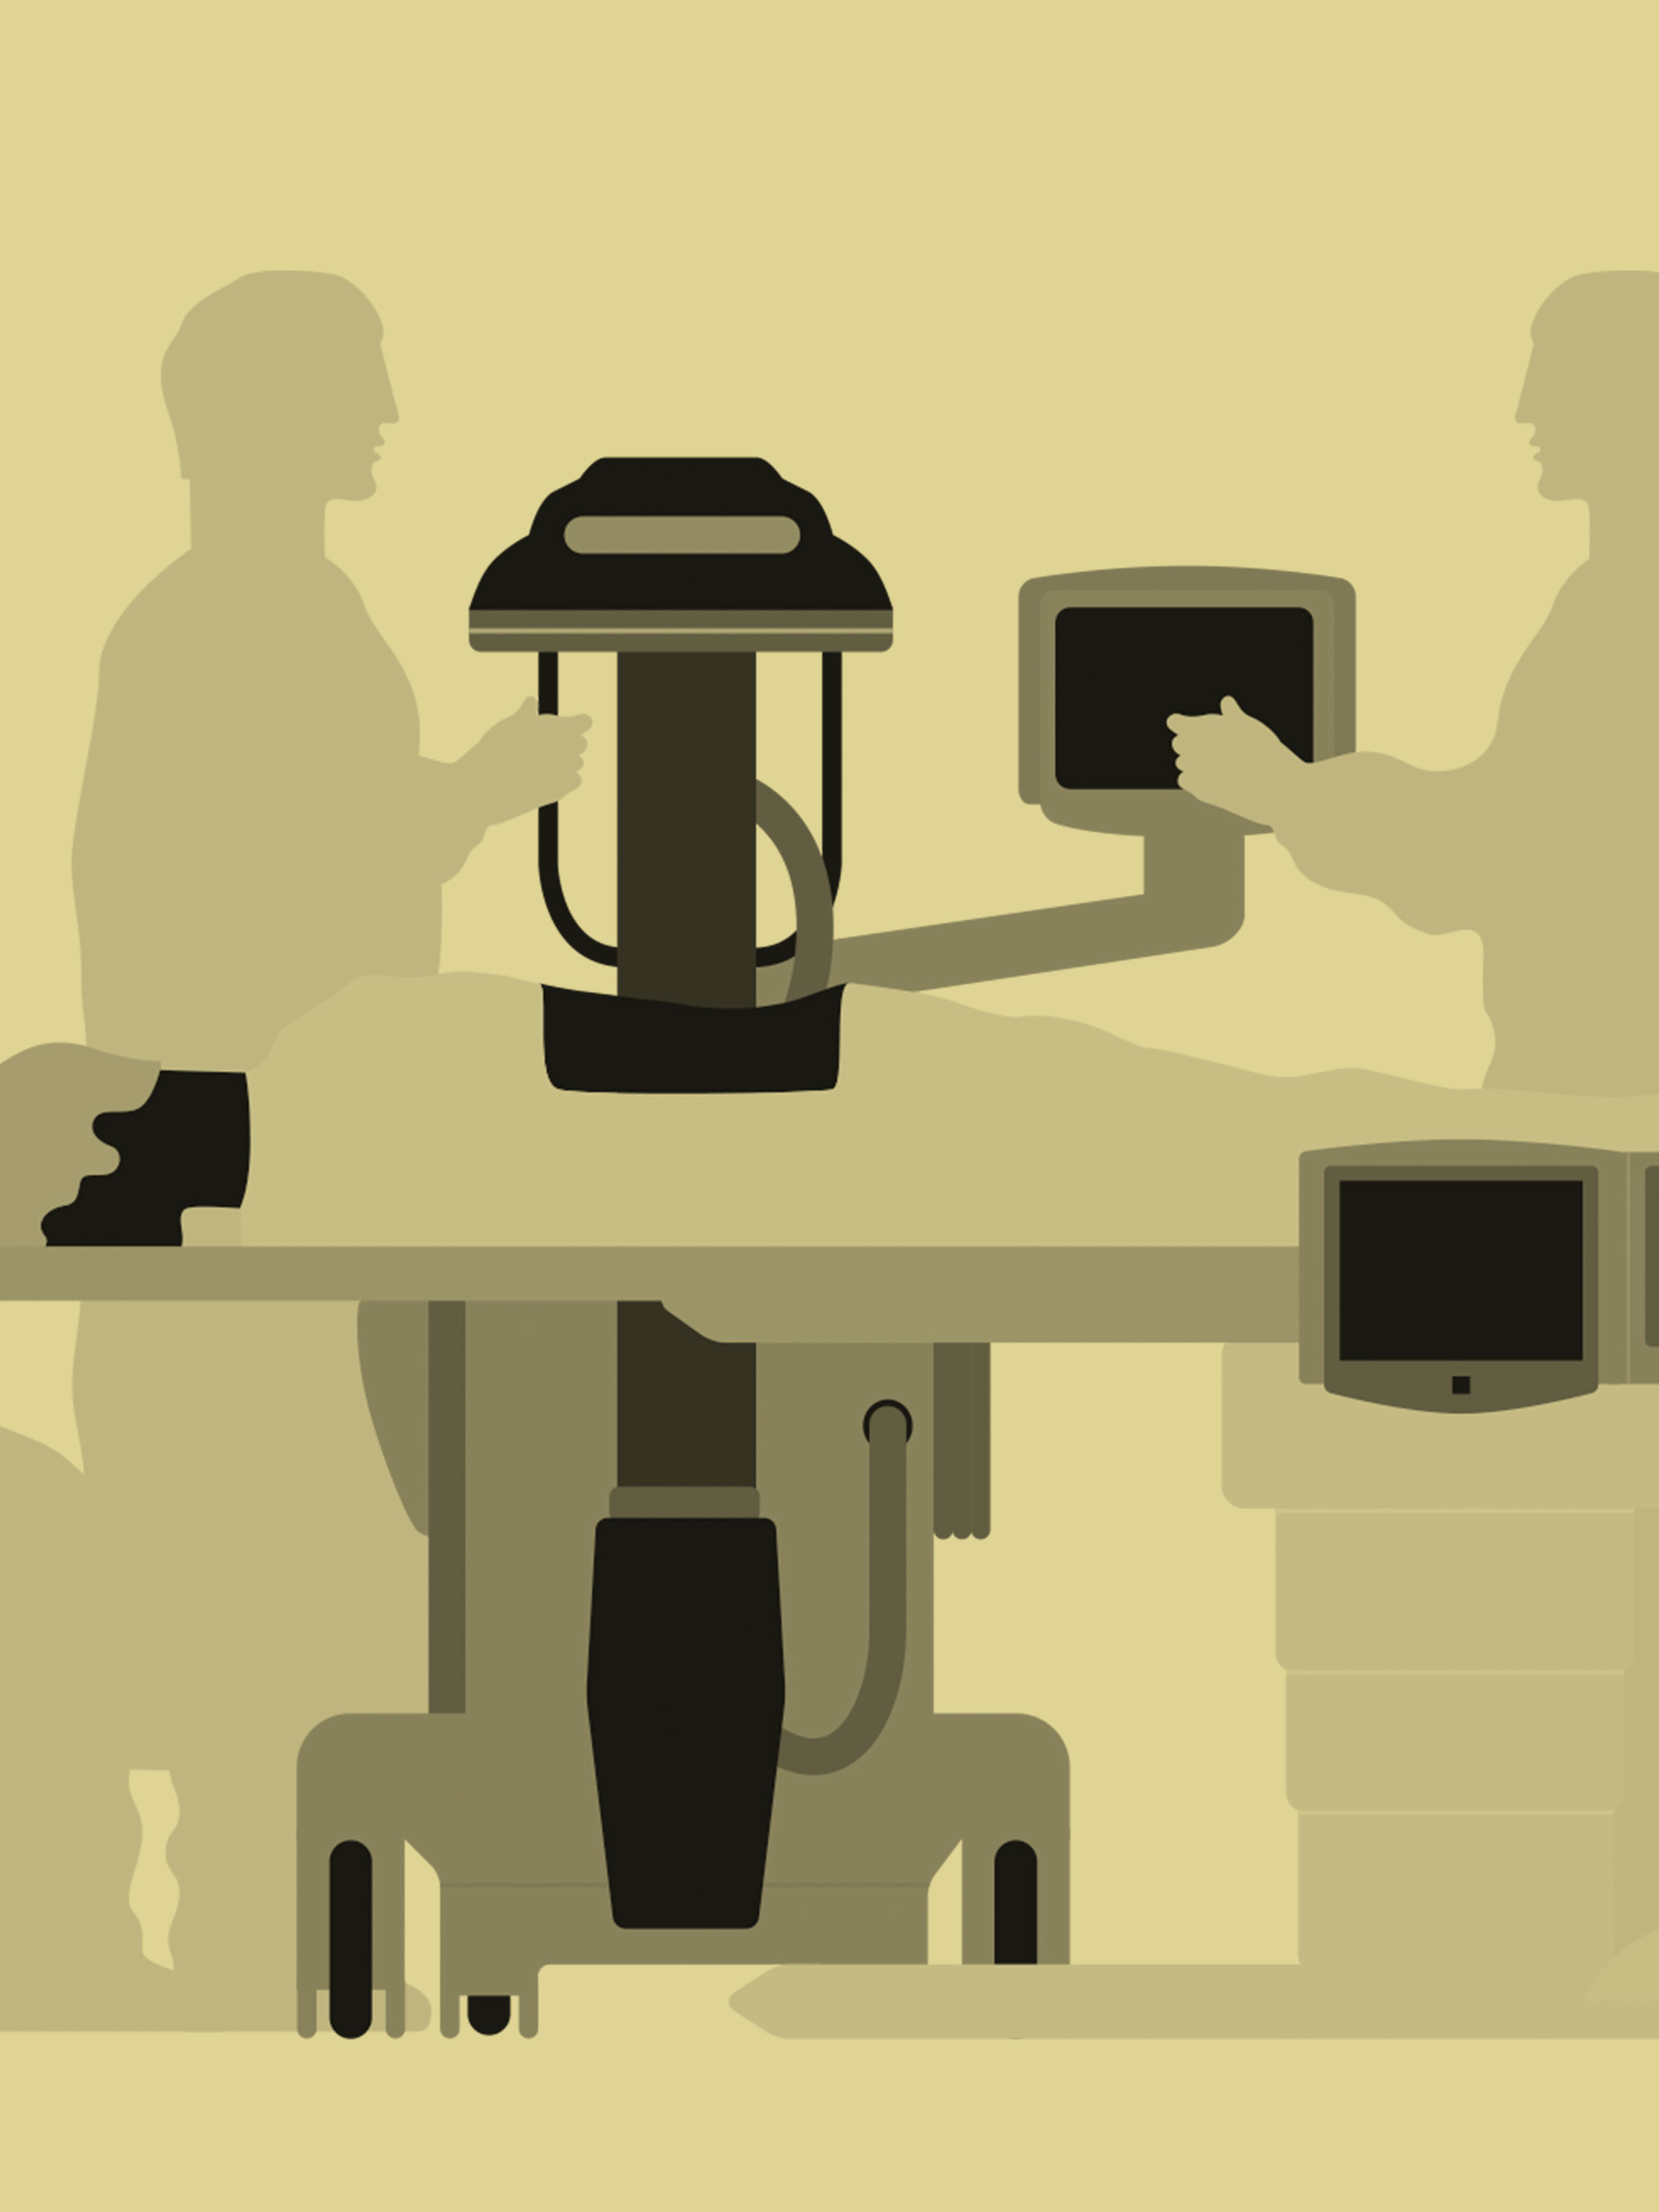
The right operating table
On an adjustable carbon table top or carbon table top segment, the patient can be optimally positioned for the C-arm’s scan center with respect to height and lateral horizontal shift. The table top can also be imaged without creating any artifacts.
Special table accessories
For operations on the scull or the elbow or wrist, special operating table systems, extensions or carbon head holders should be used.
2
Prepare the patient
Proper positioning
Positioning aids that will remain in the scan field (such as leg or pelvic supports) also need to be able to be scanned without producing any artifacts. It is always better to remove positioning aids from the scan center in order to allow room for the orbital movement. This also permits the dose applied to the patient to be reduced. For operations on the cervical spine, the patient’s arms should be positioned next to the body.
Use exposure protection
For many applications, a lead apron can also be used for the patient to guarantee optimum radiation protection.
Control the contralateral surgical region
For surgical procedures involving the lower extremities, as much of the contralateral surgical region as possible should be removed from the radiation field. Before surgery, it should be checked whether an osteosynthetic or prosthetic implant has been implanted in this region.
Position the structure to be operated on in the isocenter
For surgical procedures involving the upper body (e.g. on the spine), the patient should be positioned as centrally as possible on the operating table. For scans of the hip, shoulder or extremities, the side to be operated on should be located opposite the C-arm and should be placed closer to the center of the operating table.
Sterile draping of the surgical field
During the 3D scan, the generator moves below the operating table and across the height of the table. For this reason, maximum sterility below the table must be ensured; this can be achieved through proper sterile draping.
3
Prepare for the successful 3D scan
Start up the C-arm in good time
In order to avoid unnecessary down time in the operating room, the C-arm can already be switched on while the patient is being positioned.
Optimal presettings
Thanks to the C-arm’s individual settings to accommodate the patient’s size, the area of application and the body region to be operated on in the 3D menu, the radiation, scan and path parameters are automatically selected to ensure optimum image quality.
Setting the starting position
To ensure a smooth surgical procedure, the “Starting position” menu item should be used to place the C-arm in starting or neutral position.
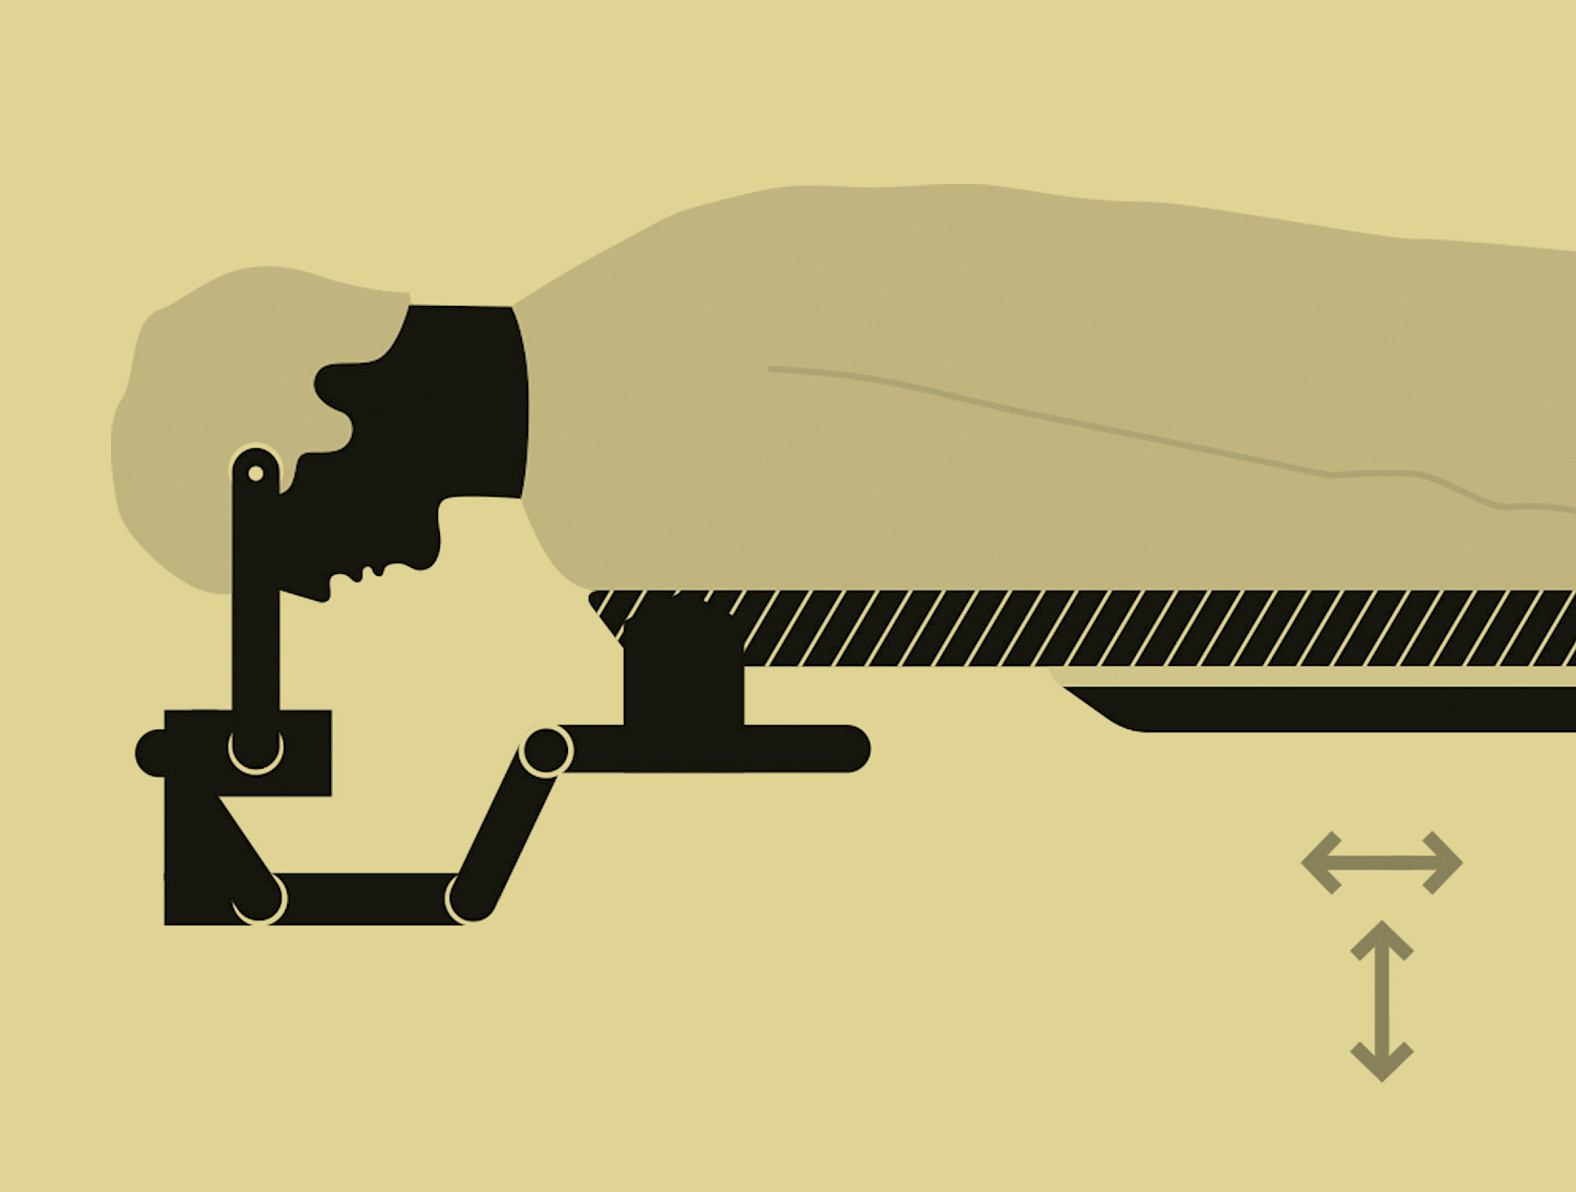
Proper positioning
The region of interest (ROI) is set with the two vertically stacked and one horizontal laser of the C-arm in the isocenter in an efficient and exposure-free manner. A motorized operating table is particularly helpful for positioning.
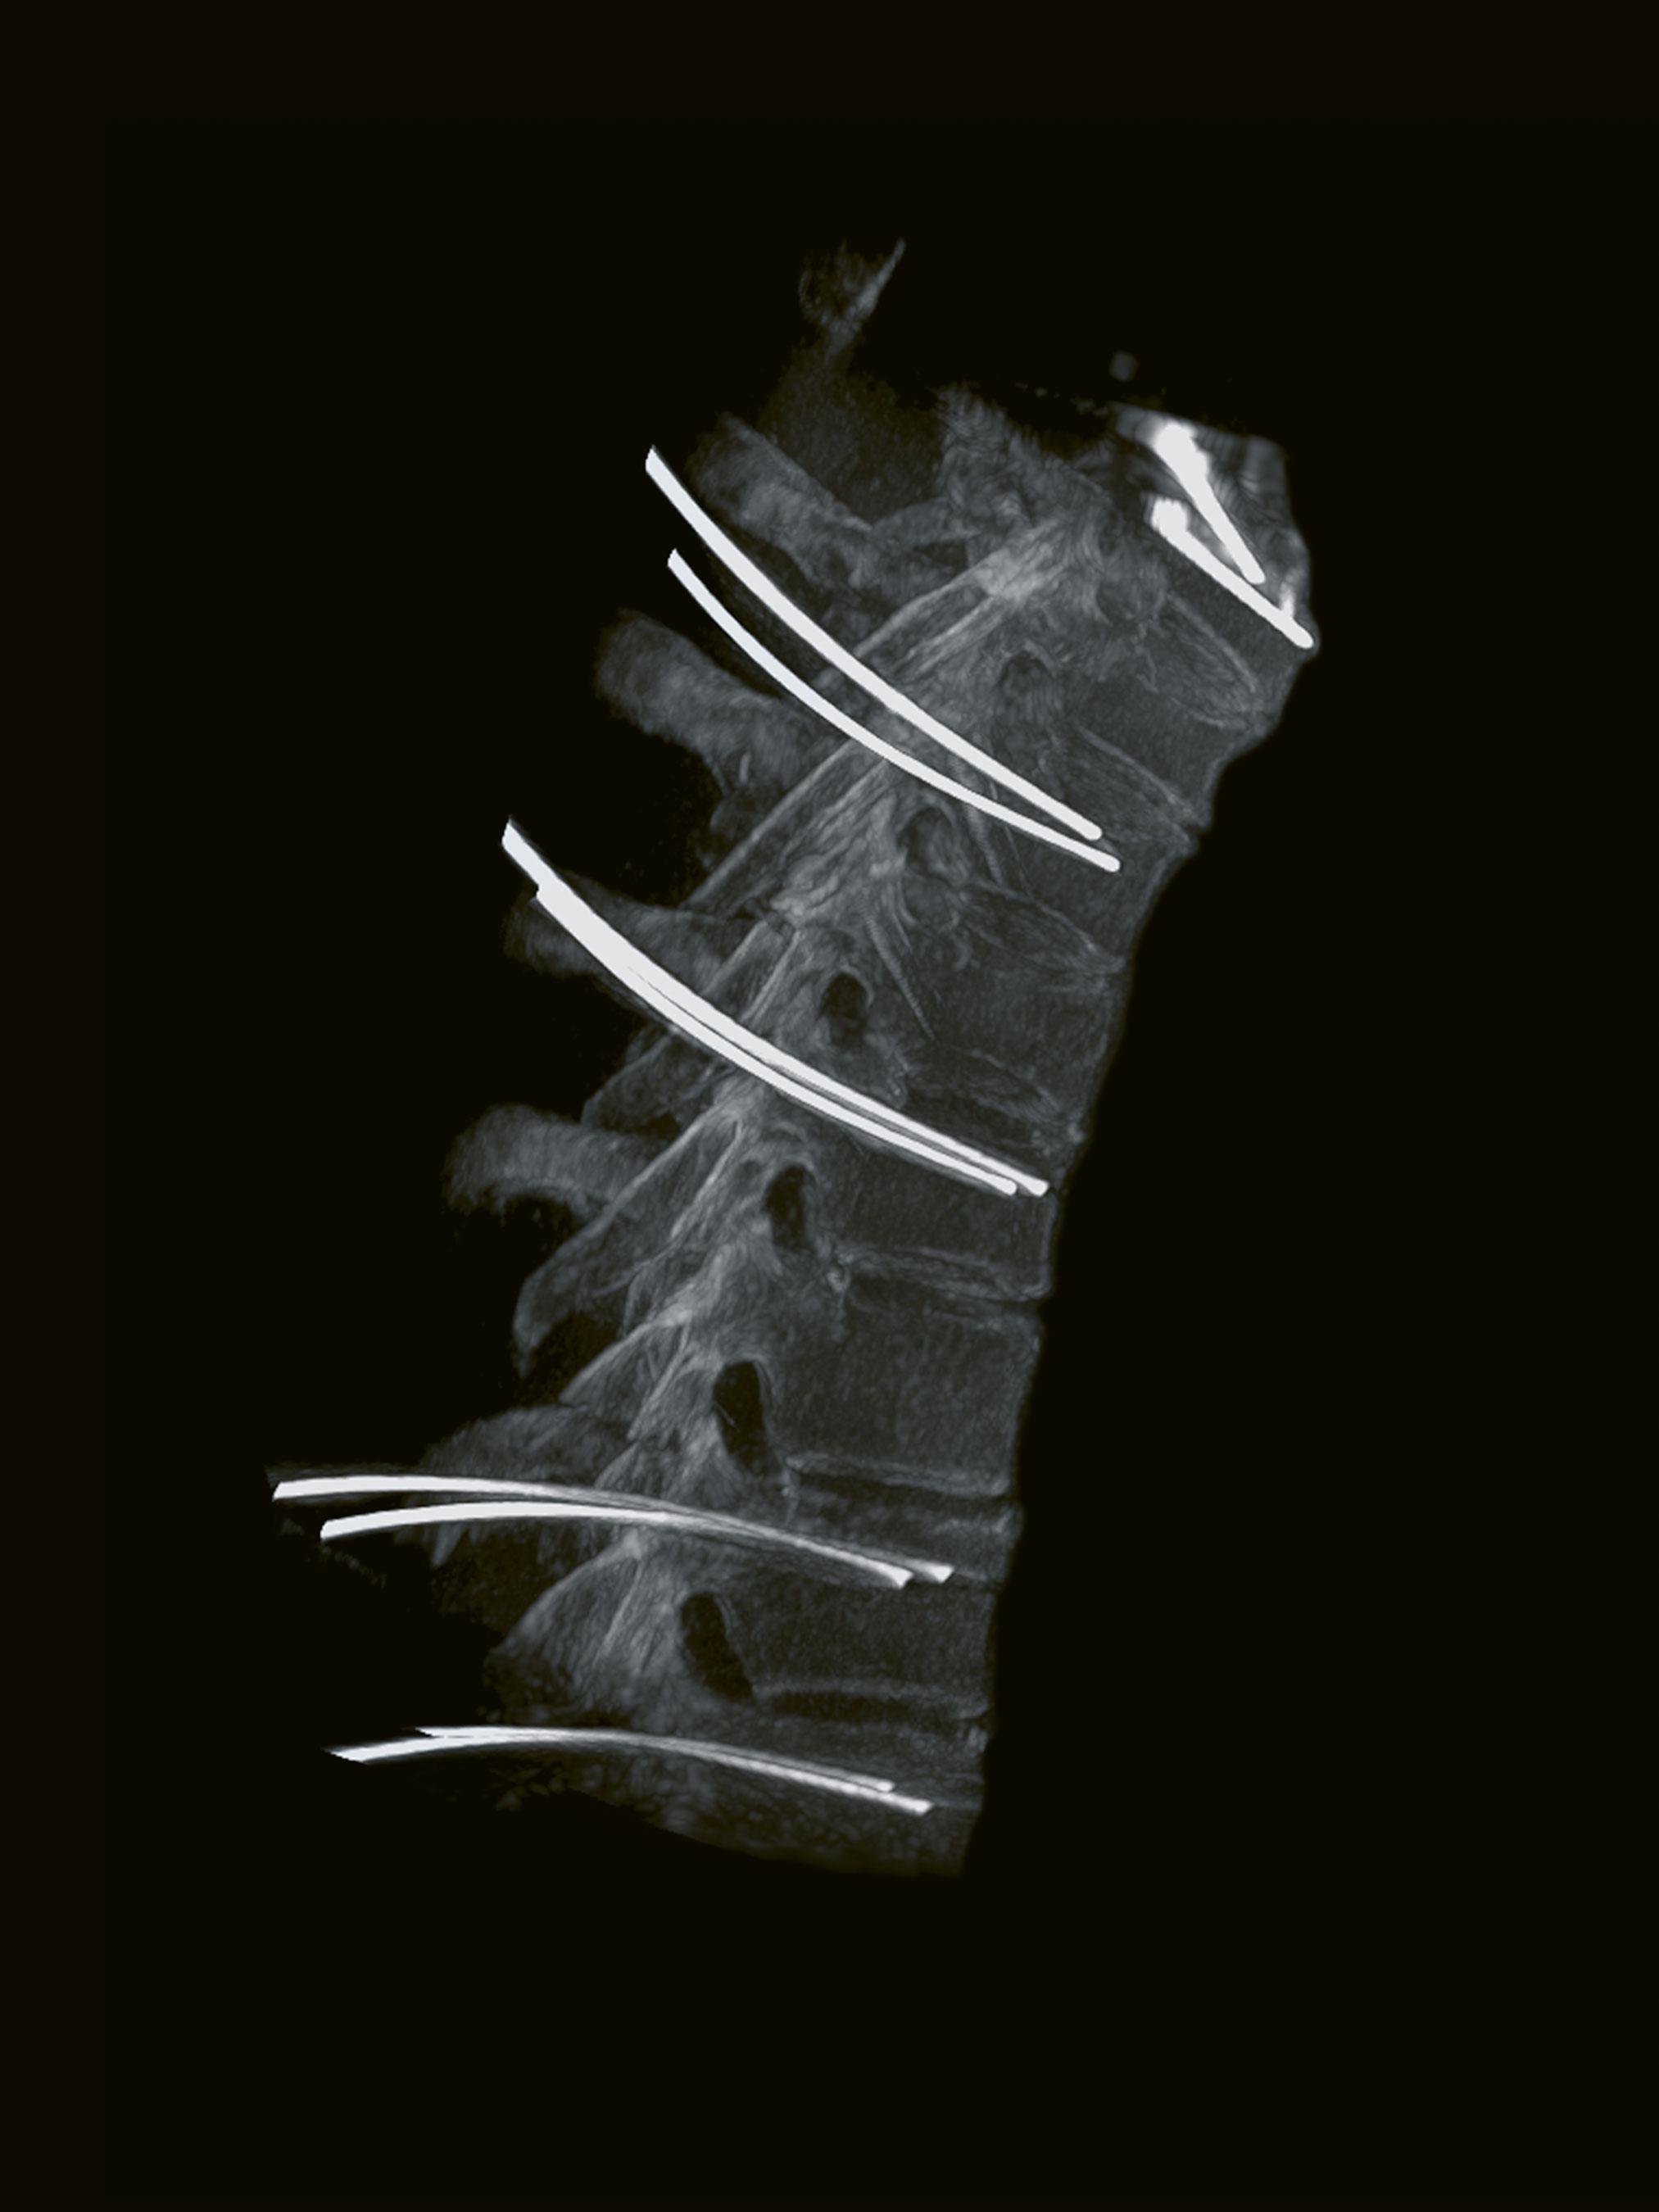
Preventing information loss
If a screw or an implant is located exactly in the C-arm’s 3D rotation angle, information behind the metallic body can be lost (orthogonal effect). Rotating the C-arm by as little as 5 – 10° can bring about successful 3D results.
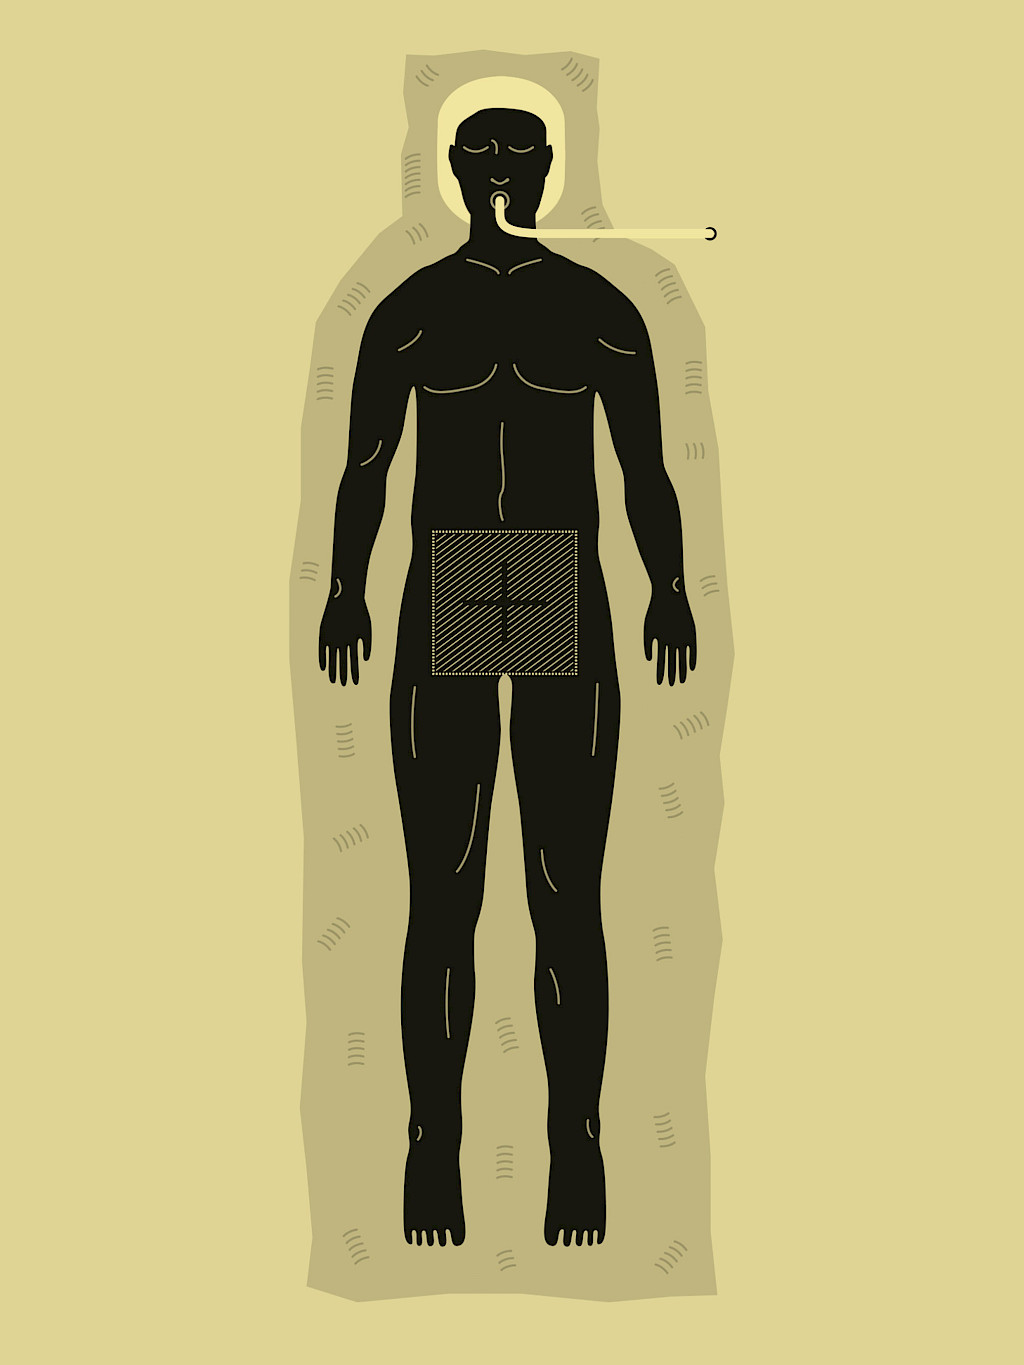
Collision check
The reconstructed data volume has an edge length of 16 cm. In order to display the surgical site in the best possible manner in the isocenter, during the collision check, a 2D image should be taken in both anteroposterior and in lateral position. Afterwards, corrections to the patient positioning can be carried out as needed.
Correcting the trajectory
During the collision check of the C-arm for the 3D scan, in the event of a collision with an object, such as the table, it is possible to correct the trajectory in a horizontal direction. This enables optimal adjustment of the orbital rotation for the C-arm to the actual conditions, without losing the presettings or limiting the scan field.
Breathing stop for better image quality
For spinal operations in particular, the patient’s breathing must be stopped in expiration for the duration of the 3D scan (approximately 45 seconds). If this is communicated five minutes ahead of time, the patient can be hyperoxygenated.
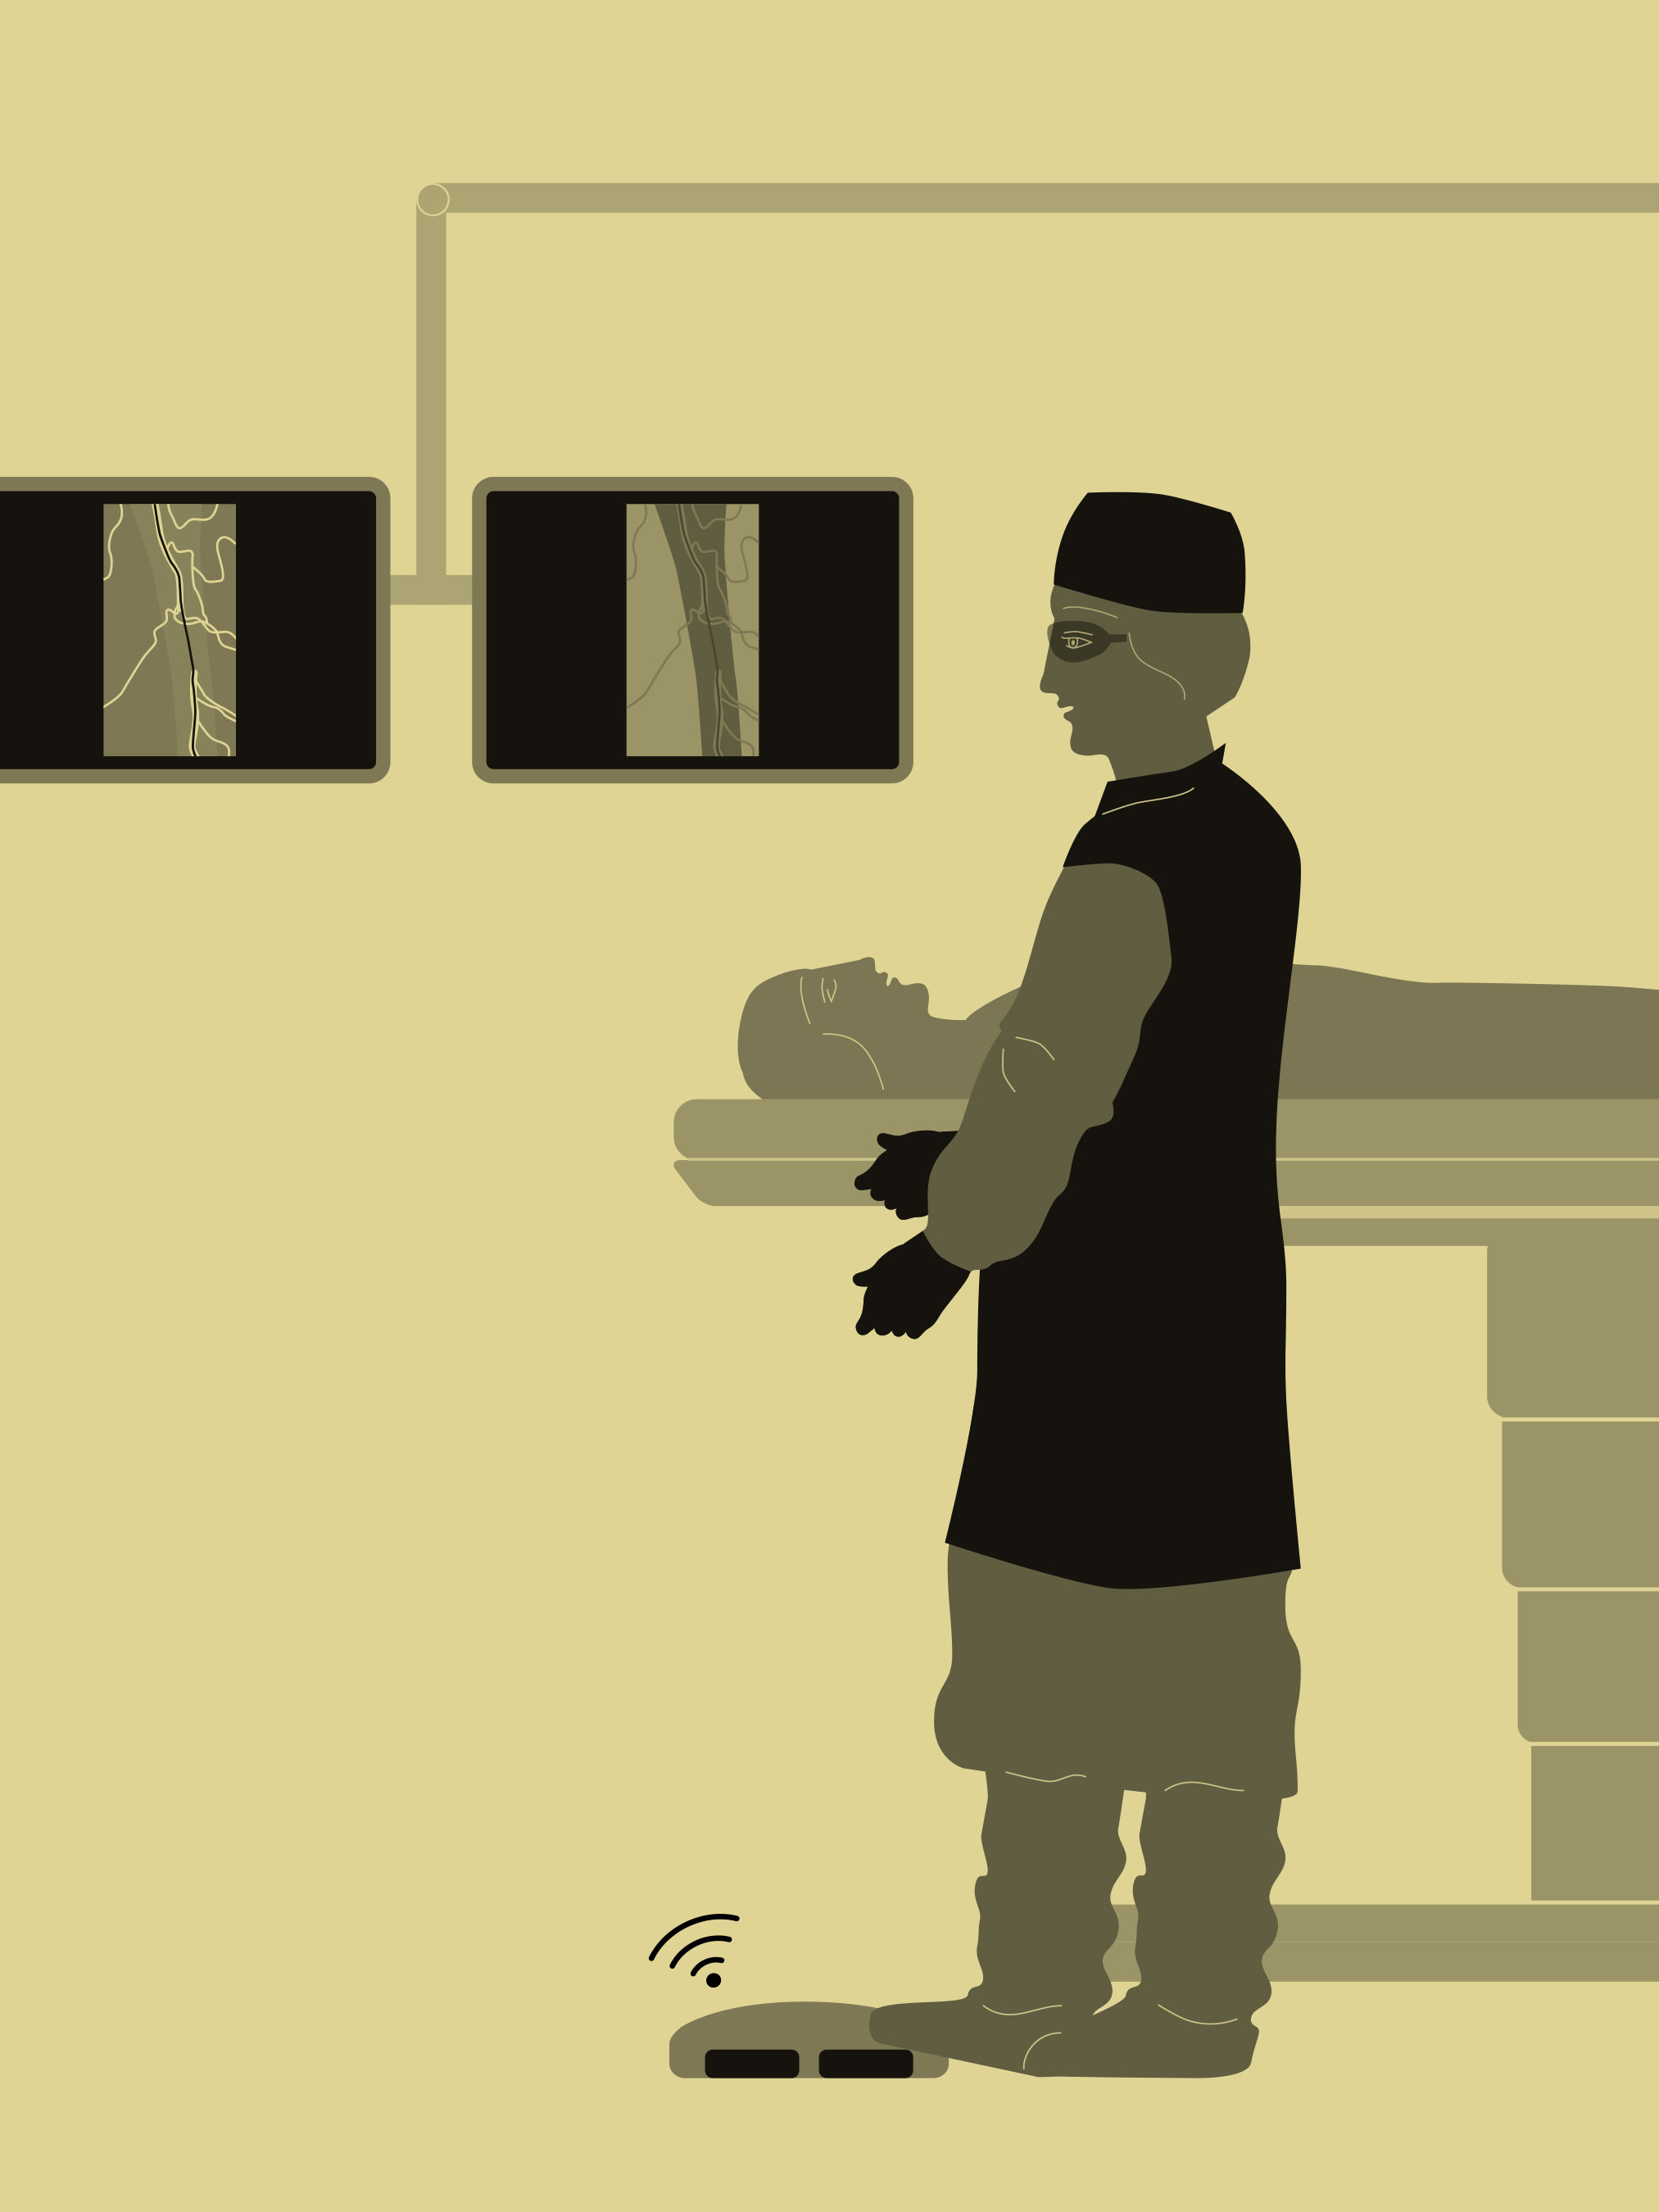
Now, the wireless footswitch is used to start the fully automatic scan from outside the operating room. The team exits the room and is protected from exposure.
These tips & tricks were published in issue 1 (2017).
Download issue 1 as PDF